
Subscribe to our RSS here.
JMeter, Google Drive, and OAuth

Where are we?
This is the forth post in our introduction to JMeter series.
On the first post we learned the building blocks of a JMeter plan by creating a series of requests to fetch Bitcoin trading data.
The second post served to improve what we’ve built by removing duplication using variables.
Finally in the third post we learned how to add more validations, such as response metadata, response duration, and JSON content.
In this post we will see how to save files on Google Drive, using OAuth to authenticate our requests.
Fetching an access key to Google Drive
Access keys are cryptographic strings that allow computers to communicate securely.
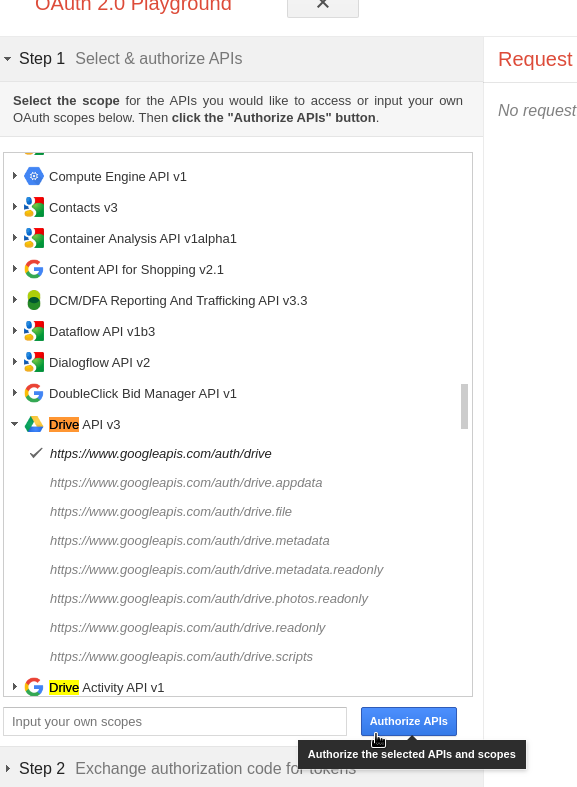
To have access to Google Drive functions, we have to acquire a token from it. We do it by selecting the token scope on the OAuth 2.0 Playground.
If we head out to there we can select a Google Drive API we want to use:
Afterward, we can exchange our Authorization Code (permanent) for an Access Token (temporary) that we can use for a period to access Google Drive functions:

We will use this token in our JMeter Plan.
Preparing JMeter plan
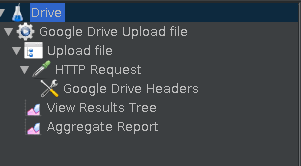
Our JMeter plan will be similar to the ones we’ve built, consisting of one Thread Group, one Simple Controller, one HTTP Request and some Listeners.
In the Test Plan, we will define our global variables.

We define that we want to send requests to the Google APIs server, using POST HTTPs requests. Additionally, we place here the access token we created before.
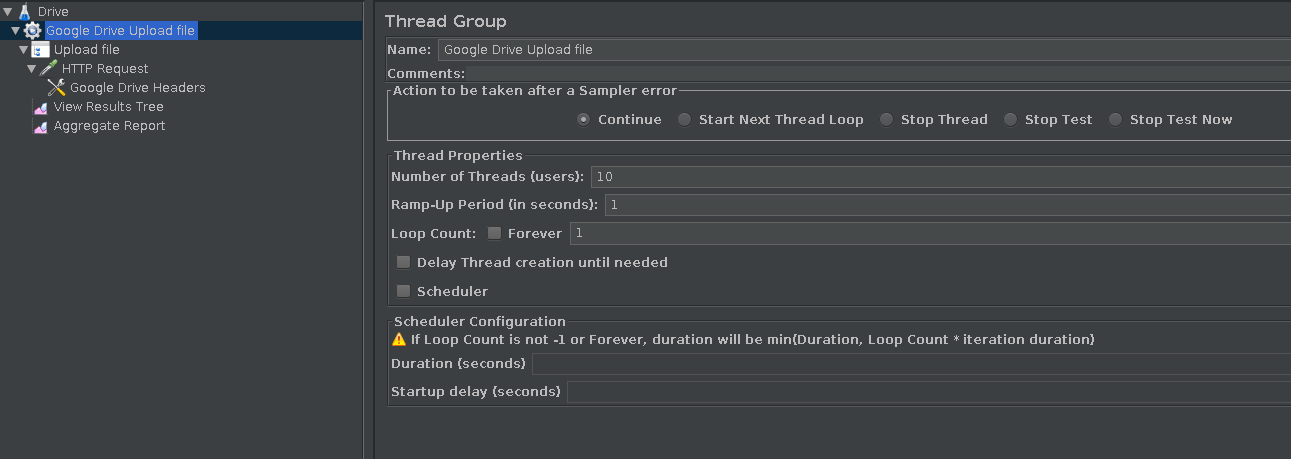
The Thread Group defines we will send 10 requests.
The HTTP Request component contains the core of our plan.
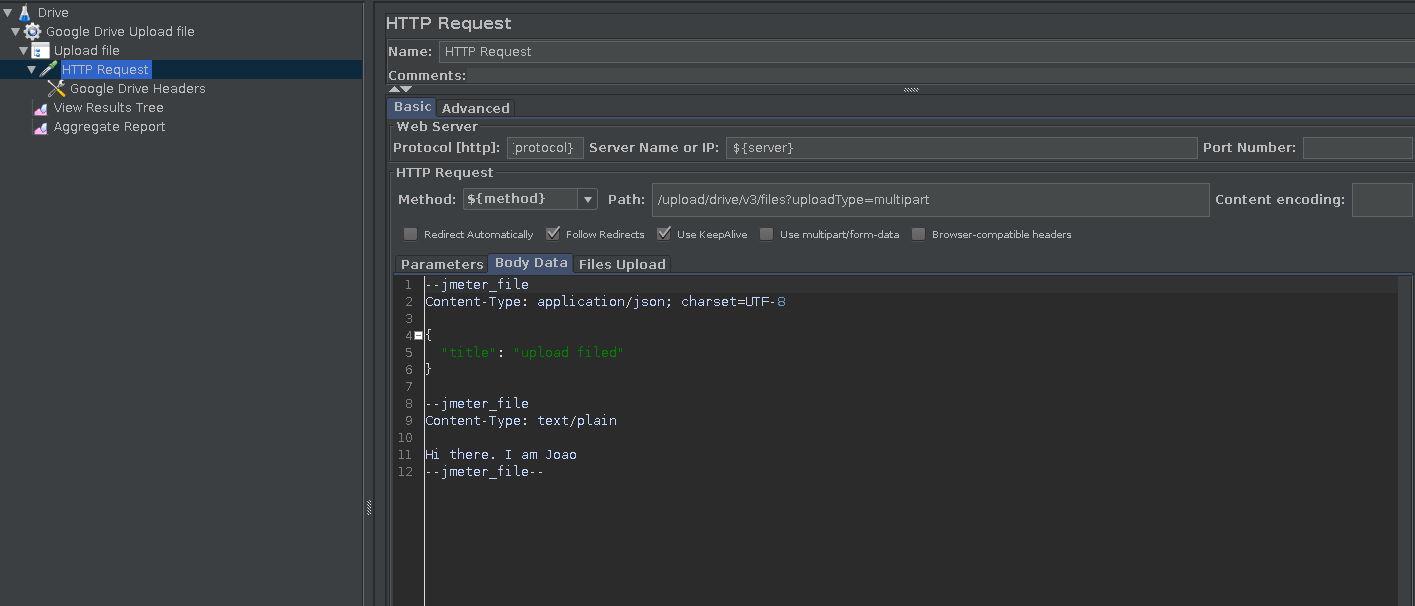
Here we indicate we want to use the HTTP protocol, server, and method from the Test Plan.
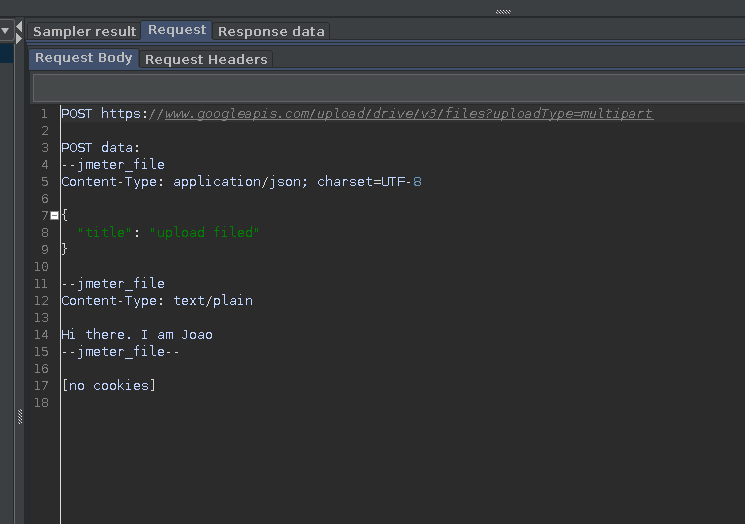
In Path we define the endpoint we want to hit: /upload/drive/v3/files. Additionally, we inform we will pass the information in multiple parts: uploadType=multipart
The final point is the Body Data, where we will hardcode the text we want to save as a file. Here we will create a text file with the text Hi there. I am Joao.
The final piece we need to configure is the HTTP Headers component:
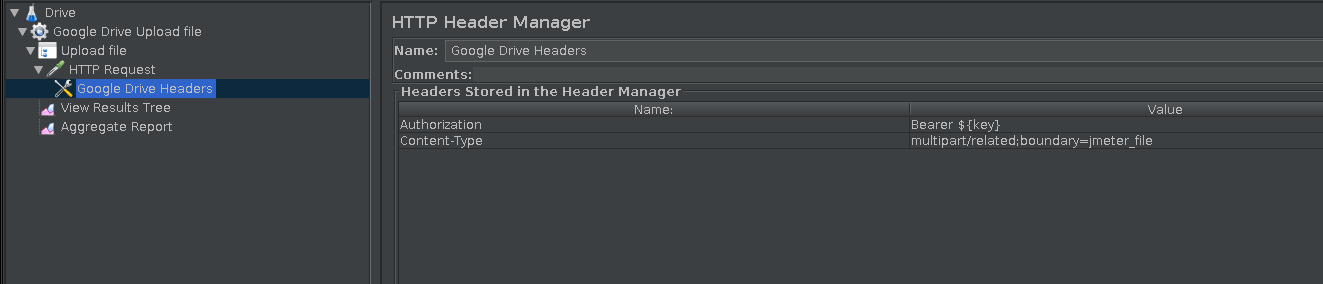
Here we concatenate our Authorization key with Bearer, which is the format OAuth applications understand. Additionally, we pass the Content-Type as multipart so the Google Drive application can understand the format of our data.
Results
If we add a View Results listener and execute our plan, we will see that all requests are successful.

Additionally, we can see the details of our request:
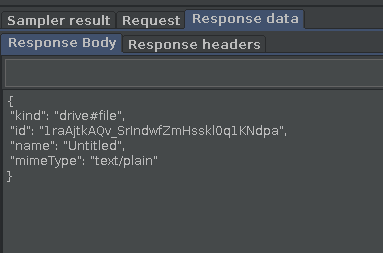
And also the details of the response:
What happens if we have more users?
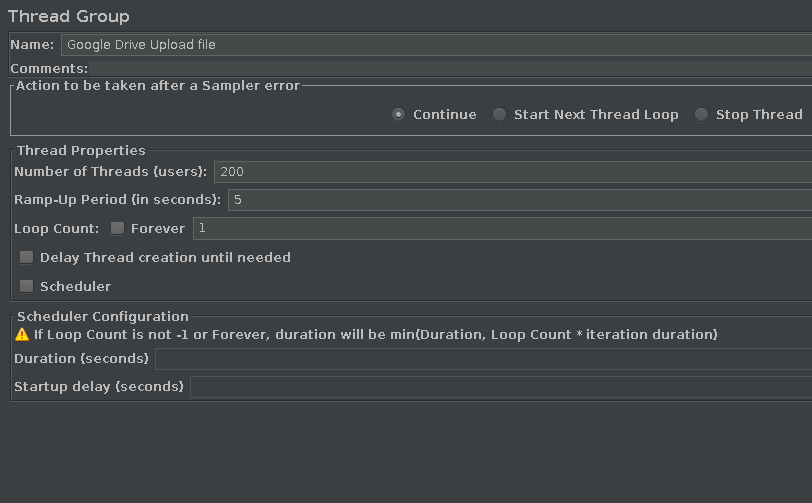
An interesting behavior happens if we try to stress the Google Drive endpoint by sending more requests.
For instance, if we try to send 200 requests during a period of 5 seconds:
We see the most requests will fail:
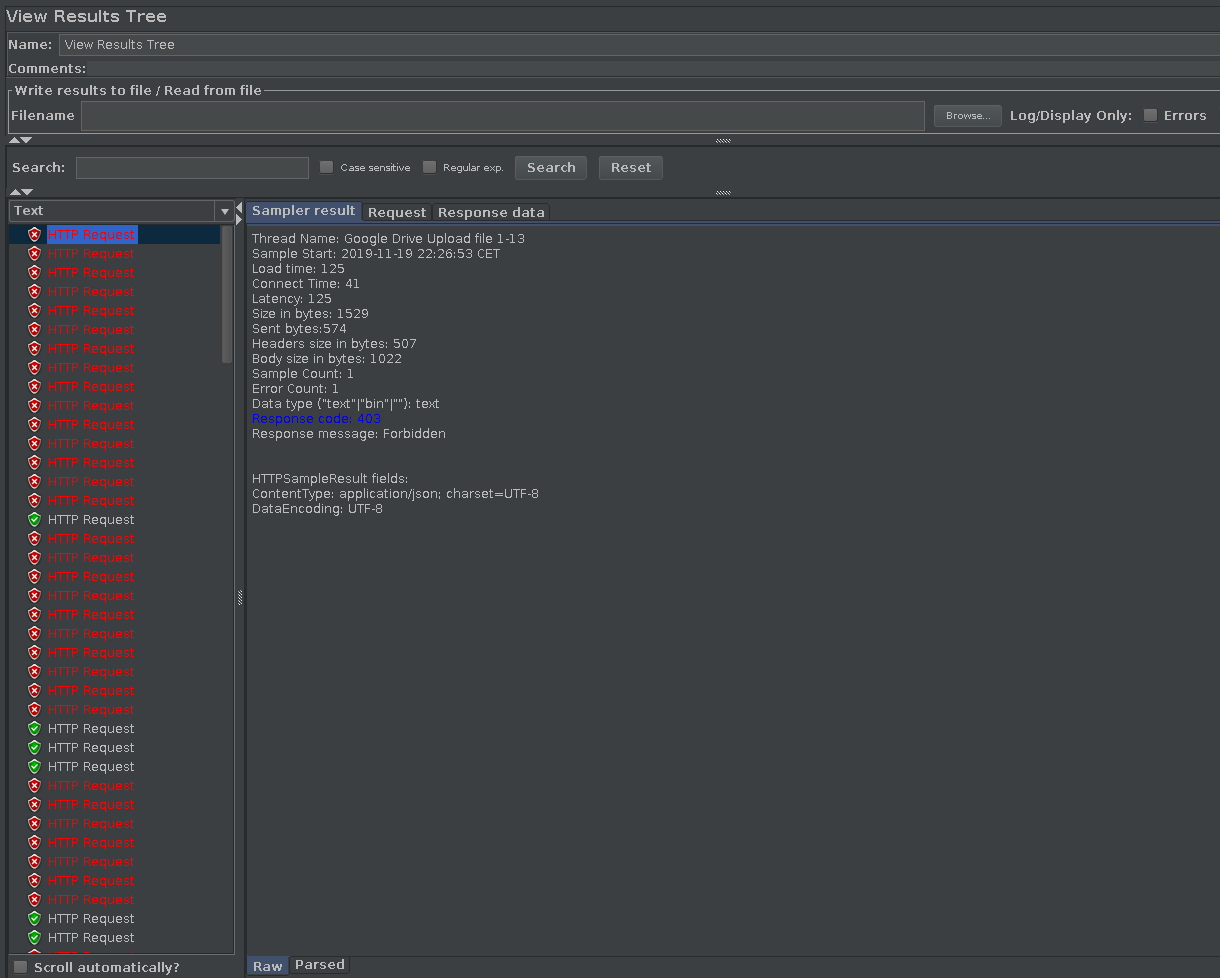
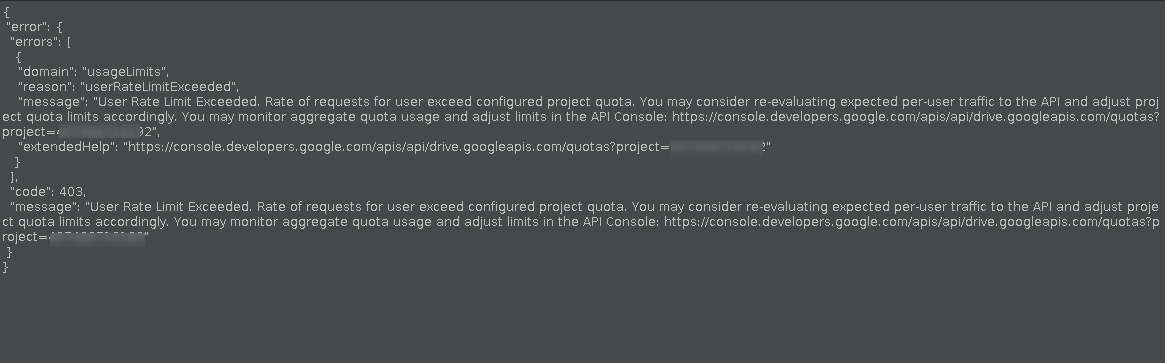
But not because of a performance inability of the Google Drive. The problem is that each user has a quota limit for upload:
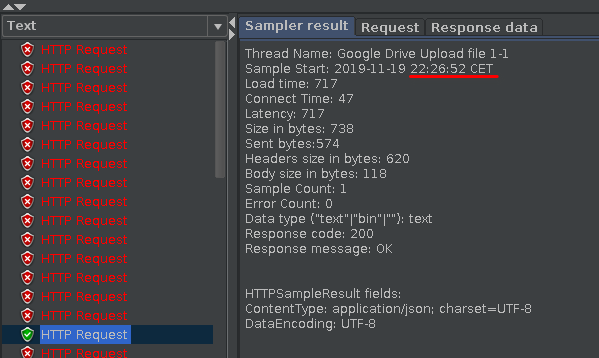
You may find strange that our first requests failed due to the quota problem, but some of following ones passed.
The fact is that the View Results listener will show the requests in order of response arrival. Probably is the case that the quota error takes a bit more time to be processed than the passing requests.
You can see that our first requests actually passed by checking the timestamp of each request:

Conclusion
We saw that secure connections require some more preparation of our JMeter plans, with the setup of access tokens.
The example here, of course, is basic. For more reliable and constant usage of secure connections, we would have to manage token refresh and request load frequency, which are application-specific aspects.
Nonetheless, after the setup, our JMeter plans look very similar to what we were doing before, showing how JMeter’s interface clearly separates concerns.
In the next post, we will see how to setup Jenkins to run a JMeter plan.
Leave a comment